FreeBSD
![]()
I'm still in the process of translating this to English - so at some point you will probably encounter some German. I wanted to try out FreeBSD for a ZFS RAID fileserver (HP Proliant Microserver Gen 10) - so what I describe here should take you through the whole process if you have some issues with the same device.
Installation
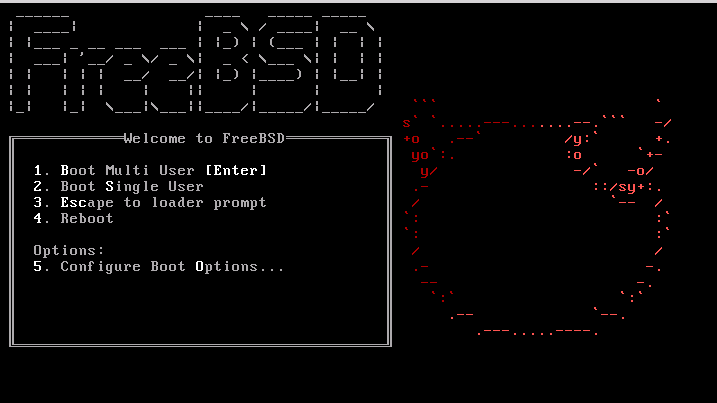
If you want to install FreeBSD on an HP Proliant Microserver Gen 10, you'll probably run into some
problems with VGA output. You can still SSH into the machine - if configured - but an attached screen
will draw a blank.
To circumvent this, ESCape to loader prompt while in the bootloader.
 Type
Type
set hw.pci.realloc_bars=1
boot
into the prompt. This change is only temporary though, so after installation you have to add
hw.pci.realloc_bars=1
into /boot/loader.conf. After installation you will be asked if you want to make any additional changes before
rebooting, which is a good opportunity to do it.
 After adding your changes you can reboot from the harddrive end remove the installation medium.
Some important commands
In Progress.
| Command | Description |
|---|---|
| ee, vi | built-in editors (EasyEditor, VI) |
| fsck | filesystem consistency check and repair |
| mount, umount | mount filesystem, unmount |
Kernel Modules
kldstat shows the currently loaded modules, kldload loads a module, kldunload undloads it.
Cron
[...] runs in the background and regularly checks /etc/crontab for tasks to execute and searches /var/cron/tabs for custom crontab files. These files are used to schedule tasks which cron runs at the specified times. Each entry in a crontab defines a task to run and is known as a cron job.
# /etc/crontab - root's crontab for FreeBSD
SHELL=/bin/sh
PATH=/etc:/bin:/sbin:/usr/bin:/usr/sbin 2
# if you don't set PATH every path will be absolute
# mday=day of the month, wday=day of the week
# generally only use numerical values!
# who only exists in the system-crontab, user-crontabs don't have it
#	minute	hour	mday	month	wday	who		command
	*/5	*	*	*	*	root		/usr/libexec/atrun
# */5 means every five minutes, every day
SSH/SCP/SFTP
Secure copy:
scp file.txt bantan@192.168.178.23:
Copies file.txt to the target machine. When there's no absolute path after the last :, the file will be saved to the home directory of the user. Option -r is a recursive copy.
scp -r bantan@192.168.178.23:pictures/ .
This copies /home/bantan/pictures/ from the machine you're ssh-ing into to your local machine (the dot at the end).
User Crontab
crontab -e opens the crontab with whatever editor the user has specified. If you do it for the first time it will just be an empty file.
periodic
periodic is called by the system-crontab: periodic weekly, periodic monthly, periodic daily. It executes the shell-scripts in
/etc/periodic/daily/
/etc/periodic/weekly/
/etc/periodic/monthly/
during the specified times.
Services
![]() Services that have been activated through an entry in /etc/rc.conf (e.g. natd_enable="YES") can be controlled
through the command service.
sshd for example can be started, stopped and restarted with service sshd start/stop/restart.
Services that have been activated through an entry in /etc/rc.conf (e.g. natd_enable="YES") can be controlled
through the command service.
sshd for example can be started, stopped and restarted with service sshd start/stop/restart.
service sshd rcvar checks if the service has an entry in /etc/rc.conf. If a service has no entry there yet, you can start it with service sshd onestart. You can also restart and stop services in the same way with the parameters onerestart and onestop.
service sshd status checks if the service is running and tells you the PID.
sshd
Configuration in /etc/ssh/sshd_config
An example for somewhat secure settings:
# Prevent root logins:
PermitRootLogin no
AllowUsers bantan alice Bob
# the older protocol 1 is less secure, disable unless really needed
Protocol 2
# Run ssh on a non-standard port, so it can't be portscanned easily:
Port 2322
After changing to another Port (22 is standard, should be >1024) don't forget to open the port in your firewall.
Timemachine backup
If, for whatever reason, you want to provide a Timemachine backup server, there's netatalk.
cd /usr/ports/net/netatalk3
make install clean
- Choose options DBUS, PAM and SENDFILE, also AVAHI (a Zeroconf implementation)
- After compilation create a user named timemachine - with shell "nologin", home directory "/nonexist*e*nt and full name "Time Machine User"
- chown timemachine:timemachine /data0/timecapsule/
Netatalk has its configuration in /usr/local/etc/afp.conf:
[Global]
mimic model = TimeCapsule

[SomeMacbook]
path = /data0/timecapsule
hosts allow = 192.168.178.63
valid users = timemachine
time machine = yes
There also have to be the following entries in /etc/rc.conf:
dbus_enable="YES"
avahi_daemon_enable="YES"
netatalk_enable="YES"
The services afpd (Apple File Protocol, because with Apple you have to do it the Apple way or you don't) and _cnid_metad_ (started by afpd) will be automatically started as a dependency.
The Mac needs access to port 548 on the server, then you can access TimeMachine from it with the timemachine user password of the FreeBSD server. You'll have to potentially set defaults write com.apple.systempreferences TMShowUnsupportedNetworkVolumes 1 on the Mac so you can add the server address in its Finder.
Problems during the first backup
Oh boy. You gotta love Apple.
The first backup can take really long, depending on your amount of data. I assume it tries to compress everything really hard before even attempting to send the data to the server. For some reason it tries to hold the connection to the server during this time, sending basically nothing. If there's a connection error during the backup (sending the data or just compressing), the backup will silently fail on the Mac, leaving everything it has sent so far on the server (just shitting it up, the data will not be reused in the next try) and aborting the compression process on the Mac. Effectively you have to start all over again - and hope it will finally work this time. They probably tried to do something like rsync but really shat the bed. IMHO it is a horrible backup solution, bloated and inefficient, but if you are using OSX you're probably already used to Apples shenanigans. Advice: If you are willing to invest some time, set up an rsync service and use that for backups. ZFS has filesystem compression, so you're not really losing anything.
You can try to backup to a disk first and then manually copy it to the server. See https://support.apple.com/de-de/HT202380 :
- don't have the server backup volume mounted
- plug in external harddrive, use as backup volume - then backup
- copy Backups.backupdb from the external harddrive to the server
- use the backup server as a new backup volume, then attempt to backup
What a mess.
NFS
You can add the following in /etc/sysctl.conf to improve filehandling for NFS:
kern.maxfiles=25600
kern.maxfilesperproc=16384
net.inet.tcp.sendspace=65536
net.inet.tcp.recvspace=65536
If SAMBA is not installed yet, go for it:
pkg search -o samba
pkg install samba47
The configuration is in /usr/local/etc/smb4.conf:
[global]
    workgroup = NAS
    realm = nas.local
    netbios name = NAS

[data0]
    path = /data0/nfs/
    public = no
    writable = yes
    printable = no
    guest ok = no
    valid users = youruser
The users will be assumed to exist on the server by default.
To have SAMBA start during every boot, add
samba_server_enable="YES"
to /etc/rc.conf.
You can control it with _service samba_server_.
Firewalls
FreeBSD has three firewalls to choose from: IPFW (FreeBSD developed), PF (OpenBSD developed, but with customizations - doesn't use the same syntax as OpenBSD anymore) and IPF (used to be the Solaris firewall).
I have just added instructions for IPFW, but PF seems to have somewhat shorter configs in general. It's not necessarily better - but if you have aspirations to use OpenBSD some time soon, you may as well choose PF. Also note that the FreeBSD handbook chapter on PF is before the IPFW chapter for whatever reason. They both work fine.
IPFW
Configuration is in /etc/rc.firewall, which already contains some common cases to use in your individual configuration.
You can load IPFW as a kernel module by adding
firewall_enable="YES"
firewall_type="open"
firewall_logging="YES"
firewall_script="/etc/ipfw.rules"
to /etc/rc.conf. If you use any of the existing profiles you have to include the firewall type. If you don't - you don't have to include it. IPFW can be controlled with service ipfw start.
| Profile | Description |
|---|---|
| open | Allows any and all trafficgestattet jeglichen Verkehr |
| client | Protects just this machine |
| simple | Protects the whole network |
| closed | Blocks all IP-traffic, except loopback |
| workstation | Protects just this machine, state aware |
| UNKNOWN | Deactivates the loading of rules |
| filename | Absolute path to file with rules |
For example open just contains the following rule
ipfw add 65000 pass all from any to any
Instead of defining a type, you can load a script, which is an absolute path. The executable script contains the commands, which are to be relayed to ipfw. If you want to limit the number of messages in the logs per connection, you have to define the following variable in /etc/systctl.conf:
net.inet.ip.fw.verbose_limit=5
The firewall will log to /var/log/security and depending on your settings possibly to /var/log/ipfw.*
Syntax
ipfw add RULE_NUMBER set SET_NUMBER ACTION log LOG_AMOUNT PROTO from SRC SRC_PORT to DST DST_PORT OPTIONS
| Variable | Description |
|---|---|
| RULE_NUMBER | No. from 1 - 65534, order in which they will be processed |
| SET_NUMBER | 0 - 31, without SET_NUMBER the set is always 0 |
| ACTION | allow/accept/pass/permit - allow |
| check-state - compares to dynamic state table | |
| count - adds to the counter of the rule, then next rule is processed | |
| deny/drop - block | |
| LOG_AMOUNT | if a packet uses log, it will be logged until AMOUNT, |
| if left unspecified, _net.inet.ip.fw.verbose_limit_ is applied | |
| PROTO | optional, checks with /etc/protocols |
| SRC | source, e.g. any/me, IP-Adresse, table |
| SRC_PORT | optional, number or name from /etc/services |
| DST | destination, any/me, table, IP |
| DST_PORT | optional |
| OPTIONS | optional, in, out, keep-state creates dynamic rule with same |
| protocol, as long as there's a connection (in&out), ... |
#!/bin/sh
# Example for IPFW Skript

# Empty rule list before beginning
ipfw -q -f flush
# Set rule prefix (-q is the silent parameter)
cmd="ipfw -q add"
# Interface name of NIC (network interface card)
pif="bge0"

# Allow traffic from LAN
# (substitute bge0 with your interface name)
$cmd 00005 allow all from any to any via bge0
# Allow loopback traffic
$cmd 00010 allow all from any to any via lo0
# Allow packets which have an entry in the state table
$cmd 0010 check-state

# Allow traffic to DNS
# e.g. Googles DNS is 8.8.8.8 und 8.8.4.4 (there's good reasons not to use this one though)
$cmd 00110 allow tcp from any to 123.95.14.234 53 out via $pif setup keep-state
$cmd 00111 allow udp from any to 123.95.14.234 53 out via $pif keep-state
# If you want to find out your ISPs DHCP server
# 1. Use first rule to get IP-address from logs
# 2. Uncomment second rule and delete first rule
$cmd 00120 allow log udp from any to any 67 out via $pif keep-state
#$cmd 00120 allow udp from any to x.x.x.x 67 out via $pif keep-state

########## OUTGOING TO INTERNET #############
# Allow outgoing HTTP/HTTPS
$cmd 00200 allow tcp from any to any 80 out via $pif setup keep-state
$cmd 00220 allow tcp from any to any 443 out via $pif setup keep-state
# Allow outgoing email
$cmd 00230 allow tcp from any to any 25 out via $pif setup keep-state
$cmd 00231 allow tcp from any to any 110 out via $pif setup keep-state
# Allow outgoing pings
$cmd 00250 allow icmp from any to any out via $pif keep-state
# Allow outgoing NTP
$cmd 00260 allow udp from any to any 123 out via $pif keep-state
# Allow outgoing SSH
$cmd 00280 allow tcp from any to any 22 out via $pif setup keep-state
# Block and log everything else
$cmd 00299 deny log all from any to any out via $pif

########## INGOING FROM INTERNET #############
# Deny all inbound traffic from non-routable reserved address spaces
$cmd 00300 deny all from 192.168.0.0/16 to any in via $pif     #RFC 1918 private IP
$cmd 00301 deny all from 172.16.0.0/12 to any in via $pif      #RFC 1918 private IP
$cmd 00302 deny all from 10.0.0.0/8 to any in via $pif         #RFC 1918 private IP
$cmd 00303 deny all from 127.0.0.0/8 to any in via $pif        #loopback
$cmd 00304 deny all from 0.0.0.0/8 to any in via $pif          #loopback
$cmd 00305 deny all from 169.254.0.0/16 to any in via $pif     #DHCP auto-config
$cmd 00306 deny all from 192.0.2.0/24 to any in via $pif       #reserved for docs
$cmd 00307 deny all from 204.152.64.0/23 to any in via $pif    #Sun cluster interconnect
$cmd 00308 deny all from 224.0.0.0/3 to any in via $pif        #Class D & E multicast
# Deny public pings
$cmd 00310 deny icmp from any to any in via $pif
# Deny ident
$cmd 00315 deny tcp from any to any 113 in via $pif
# Deny all Netbios services
$cmd 00320 deny tcp from any to any 137 in via $pif
$cmd 00321 deny tcp from any to any 138 in via $pif
$cmd 00322 deny tcp from any to any 139 in via $pif
$cmd 00323 deny tcp from any to any 81 in via $pif
# Deny fragments
$cmd 00330 deny all from any to any frag in via $pif
# Deny ACK packets that did not match the dynamic rule table
$cmd 00332 deny tcp from any to any established in via $pif
# Allow traffic from ISP's DHCP server.
# Replace x.x.x.x with the same IP address used in rule 00120.
#$cmd 00360 allow udp from any to x.x.x.x 67 in via $pif keep-state
# Allow HTTP connections to internal web server?
# $cmd 00400 allow tcp from any to me 80 in via $pif setup limit src-addr 2
# Allow inbound SSH connections (remember to set your nonstandard port here, if you chose to use one)
$cmd 00410 allow tcp from any to me 22 in via $pif setup limit src-addr 2

########### BLOCK EVERYTHING ELSE ##########
# Log attempts
$cmd 00499 deny log all from any to any in via $pif
# In the chance no other rule applies - block and log
$cmd 00999 deny log all from any to any
'setup keep-state' only works for the initial TCP SYN packet and 'keep state' can also keep state for other types of packets (like UDP for example) [SirDice on forums.freebsd.org]
Outgoing keep-state opens the ports dynamically for replies to outgoing traffic. These reply packets could come back on any port so keep-state reduces the exposure while opening the random ports used from the external service allowing the reply packets back in. [joe on serverfault.com]
So if a connection is established via UDP (e.g. DNS), the rule with setup keep-state will fall through - use just keep-state in that case.
Installing X-Server
# pkg install xorg
or
# cd /usr/ports/x11/xorg
# make install clean
Add users to group video or wheel (for sudo) to enable them to use hardware acceleration:
# pw groupmod video -m user
This is required because the user needs access to /dev/dri.
To be allow the terminal resolution to be changed to a higher one you need to use the vt terminal, which circumvents some potential problems. Add kern.vty=vt to /boot/loader.conf (usually this should be the default anyway).
In FreeBSD configurations are stored in /usr/local/etc/X11/xorg.conf.d/. Just have your changes in separate files in that directory - Xorg will configure the rest itself when it starts. Xorg -configure is deprecated and its use is not recommended anymore!
If you don't need hardware acceleration, you may use the generic scfb driver on UEFI-systems (vesa on BIOS-systems). Install with pkg install xf86-video-scfb and you're good to go. You can then configure it in a file like /usr/local/etc/X11/xorg.conf.d/scfb-driver.conf:
Section "Device"
	Identifier		"Card0"
	Driver			"scfb"
EndSection
Depending on your bootmode there will be just a single resolution available - usually a low one e.g. 800x600. To change this you can break out of the bootloader, find a fitting resolution/mode with gop list and set it with gop set x. To make this change happen every time during boot, add it to /boot/loader.rc.local (i.e. mode 5). This may or may not work due to your chosen MBR during installation (GPT UEFI, BIOS+UEFI, BIOS, ..). I didn't really invest time to clear this up, so if you're unlucky you'll have to do the gop set every time you boot.
HP Proliant Gen 10 servers use the AMD Carrizo chipset for graphics, which you can find under /usr/ports/x11-drivers/xf86-video-amdgpu. It needs a kernel support that is only available in FreeBSD 12.x - so it depends on what version you have installed.
XFCE
Install with pkg install xfce or from the ports collection (/usr/ports/x11-wm/xfce4). Since XFCE doesn't come with its own loginmanager, like gnome or KDE, you have to add the following to ~/.xinitrc if you want to start it automatically with startx:
exec /usr/local/bin//startxfce4 --with-ck-launch
ZFS
- Data has a checksum, which will be saved together with the data. During reads the checksums will be compared to the data and errors will automatically be corrected if possible.
- Physical media kann be added together to pools and the resulting space will be available to all filesystems (extensibility)
- Caching mechanisms (ARC, L2ARC, ZIL) allow for speed increases
Activate by adding
zfs_enable="YES"
to rc.conf and start with service zfs start.
You can get an overview over attached media with camcontrol devlist, which will show you the names of the physical devices.
<Corsair Force LS SSD S9FM02.6>    at scbus0 target 0 lun 0 (ada0,pass0)
<WDC WD30EFRX-68EUZN0 82.00A82>    at scbus1 target 0 lun 0 (ada1,pass1)
<WDC WD5000BPVT-00HXZT3 01.01A01>  at scbus2 target 0 lun 0 (ada2,pass2)
The pools don't have to be mounted with fstab, it's done automatically by zfs (if they have a mountpoint specified).
Pool mit einer Platte
zpool create beispielname /dev/ada0
Die Ausgabe von df oder zfs status sollte dann anzeigen, dass alles i.O. ist:
pool: data
state: ONLINE
scan: none requested
Oder komprimiert:
zfs create beispiel/compressed
zfs set compression=lz4 beispiel/compressed
Die Komprimierung kann mit zfs set compression=off beispiel/compressed wieder deaktiviert werden. Nur neue Daten, die nach Aktivierung der Komprimierung geschrieben werden, werden auch komprimiert. Userland tests of LZ4 compression of incompressible data in a single thread has shown that it can process 10GB/sec, so it is unlikely to be a bottleneck even on incompressible data. [open-zfs.org]
Um die Ausfallsicherheit bei wichtigen Daten zu erhoehen kann jeder Block doppelt gespeichert werden:
zfs set copies=2 example/data
Loeschen von Dateisystemen und Pools:
zfs destroy example/compressed
zfs destroy example/data
zpool destroy example
Reservierungen
Um die Lebenszeit von SSDs zu erhoehen, wird empfohlen ca 10 GB Speicher staendig freizuhalten. Reservierungen koennen auch verwendet werden um immer Speicherplatz fuer wichtige Logs zu sichern.
# zfs set reservation=10G storage/home/bob
Um die Reservierung zu beseitigen:
# zfs set reservation=none storage/home/bob
Reservierungen anzeigen mit zfs get reservation storage/home/bob
Pools
Ein Pool besteht aus einem oder mehreren vdevs, die selbst eine einfache Platte oder im Fall von RAID eine Gruppe von Platten darstellt. [FreeBSD Handbook]
- ganze Festplatte (kann ueber zpool attach zu einem Mirror aktualisiert werden)
- File (zum Testen)
- Mirror aus min. 2 Geraten (Redundanz bis ein Geraet uebrig)
- RAID-Z (Varianten von RAID-5)
- Spare (ein Pseudo-vdev um ausgefallene Gerate mit zfs replace zu ersetzen)
- Log/ZIL/ZFS Intent Log (verschiebt Intent Log auf schnelleres Geraet, zB fuer Datenbanken)
- Cache (erhoeht L2ARC/Lesecache)
Mirror mit 2 Platten
zpool create data0 mirror /dev/ada0 /dev/ada1
zfs set compression=lz4 data0
Sets von Daten koennen mit
zfs create data0/timecapsule
zfs set quota=500G data0/timecapsule
erstellt werden. Dem Set /data0/timecapsule wurde anschliessend eine Quote von max. 500GB zugewiesen.
Datenverifizierung
Die Verifikation der Pruefsummen wird auch als scrubbing bezeichnet:
zpool scrub beispiel
Unter zpool status beispiel wird dann die Fehlerzahl angezeigt. Fehlermeldungen koennen mit zpool clear beispiel beseitigt werden.
Ersetzen eines ausgefallenen Geraets
Faellt eine Platte in einem Pool aus, erhaelt er den Zustand degraded. Beim Auswechseln der defekten Platte wird der Name mit der GUID (18 stellige Zahl) ersetzt. Wenn die Ersatzplatte den gleichen Geratenamen (z.B. ada2) besitzt, wird kein neuer Geraetename von zpool replace benoetigt.
# zpool status
#   pool: mypool
#  state: DEGRADED
# status: One or more devices could not be opened.  Sufficient replicas exist for
#         the pool to continue functioning in a degraded state.
# action: Attach the missing device und online it using 'zpool online'.
#    see: http://illumos.org/msg/ZFS-8000-2Q
#   scan: none requested
# config:
#         NAME                    STATE     READ WRITE CKSUM
#         mypool                  DEGRADED     0     0     0
#           mirror-0              DEGRADED     0     0     0
#             ada0p3              ONLINE       0     0     0
#             316502962686821739  UNAVAIL      0     0     0  was /dev/ada1p3
errors: No known data errors
# zpool replace mypool 316502962686821739 ada2p3
# # zpool status
#   pool: mypool
#  state: DEGRADED
# status: One or more devices is currently being resilvered.  The pool will
#         continue to function, possibly in a degraded state.
# action: Wait for the resilver to complete.
#   scan: resilver in progress since Mon Jun  2 14:52:21 2014
#         641M scanned out of 781M at 49.3M/s, 0h0m to go
#         640M resilvered, 82.04% done
# config:
#         NAME                        STATE     READ WRITE CKSUM
#         mypool                      DEGRADED     0     0     0
#           mirror-0                  DEGRADED     0     0     0
#             ada0p3                  ONLINE       0     0     0
#             replacing-1             UNAVAIL      0     0     0
#               15732067398082357289  UNAVAIL      0     0     0  was /dev/ada1p3/old
#               ada2p3                ONLINE       0     0     0  (resilvering)
errors: No known data errors
# zpool status
#   pool: mypool
#  state: ONLINE
#   scan: resilvered 781M in 0h0m with 0 errors on Mon Jun  2 14:52:38 2014
# config:
#         NAME        STATE     READ WRITE CKSUM
#         mypool      ONLINE       0     0     0
#           mirror-0  ONLINE       0     0     0
#             ada0p3  ONLINE       0     0     0
#             ada2p3  ONLINE       0     0     0
ZFS Admin Manual by Oracle: The following are the basic steps for replacing a disk: – Offline the disk, if necessary, with the zpool offline command. – Remove the disk to be replaced. – Insert the replacement disk. – Run the zpool replace command. For example: [CMD="zpool"] replace pool_name old_device new_device[/CMD] (New device should be given as /dev/name). – Bring the disk online with the zpool online command.
Wenn die ausgefallene Platte die Betriebssystemplatte war, kann mit
zpool import -f [pool name|ID]
der alte Datenpool importiert werden. Die -f Flag ist noetig, da ZFS, mit der Warnung, dass der Pool vorher von einem anderen System genutzt wurde, den Import abbricht.
Installation/Deinstallation von Software
Ports Collection
portsnap fetch laedt eine komprimierte Version der Ports Collection nach /var/db/portsnap herunter. Um sie nach /usr/ports zu entpacken: portsnap extract
Nach diesem ersten Mal kann mit
# portsnap fetch
# portsnap update
die Ports Collection geupdatet werden.
Die Ports sind unter /usr/ports/ zu finden. Zum Installieren eines Ports, in das Verzeichnis wechseln und
make install clean
eingeben. Es öffnet sich ein curses-Menü, in dem man Optionen (wie build flags) wählen kann - der Rest wird, inklusive einpflegen der benötigten Abhängigkeiten, automatisch erledigt.
pkg
In Bearbeitung.
classic FreeBSD offensive fortunes
https://github.com/koitsu/fortune-mod-freebsd-classic
Backups/Sicherungen
Moeglichkeiten sind u.a.
- Borg (siehe Sicherungen Zusammenfassung), inkrementell, deduplizierend
- Rsync, Spiegelung von Dateien, inkrementelle Sicherung, ueber SSH, keine Kompression (Sicherungen Zusammenfassung)
- dump/restore fuer ganze Dateisysteme
- ZFS Snapshots (auf selbem Rechner)
you probably can't use linux restore to restore dump file created on FreeBSD and wise versa, because dump file formats are probably different
rsync Installation
# cd /usr/ports/net/rsync
# make install
/etc/rsyncd.conf oder /usr/local/etc/rsync/rsyncd.conf (dort wird es auf FreeBSD standardmaessig gelesen!):
pid file = /var/run/rsyncd.pid
syslog facility = local5
uid = rsync
gid = rsync
use chroot = no

[stuboxneo]
path = /data0/rsync/stuboxneo
comment = Backup for stuboxneo linux
read only = no
list = yes
hosts allow = 192.168.178.66, stuboxneo
Statt manuellen erlaubens von einzelnen Hosts (z.B. im LAN) kann auch user auth und secrets file verwendet werden um Nutzer und Passwoerter abzufragen.
Da der Daemon als Nutzer rsync laufen soll, muss dieser noch erstellt werden (adduser, shell "nologin", Heimverzeichnis "/nonexistent", Full Name "rsync user"). Stattdessen kann unter uid/gid auch jeweils einfach nobody eingetragen werden.
Auf ZFS sollte ein Set erstellt werden, dass dem Modul (hier [stuboxneo]) eine Quote auferlegen kann.
# zfs create data0/rsync
# zfs set quota=500G data0/rsync
# chown rsync:rsync /data0/rsync
Den Daemon starten:
# echo "rsyncd_enable=YES" >> /etc/rc.conf
# service rsyncd onestart
Rsyncd empfaengt standardmaessig auf Port 873 (siehe man rsyncd.conf). Der Prozess muss als root gestartet werden, falls chroot moeglich sein soll.